Guide to Creating a QR Code generator shortcut with Jellycuts
Step 1: Setting Up the Environment
First, set up the environment for your shortcut by writing:
import Shortcuts Shortcuts
#Color: red, #Icon: shortcuts
This allows the shortcut to access actions from the iOS Shortcuts app. With Color and Icon , you can customize these aspects of your shortcut.
Step 2: Request the URL from the User
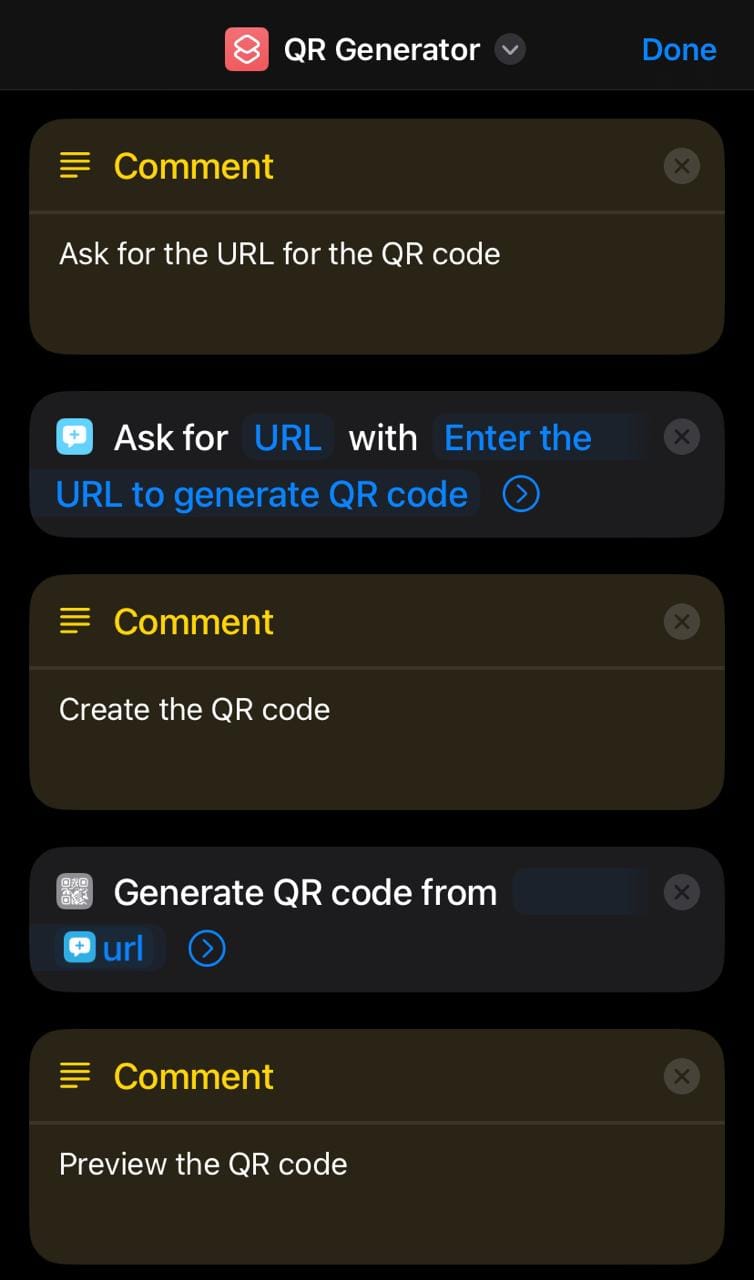
Add the capability to ask the user to enter the URL:
askForInput(prompt: "Enter the URL to generate QR code", type: URL, default:, allowDecimal: false, allowNegative: false) >> url
This line prompts the user to enter the URL and stores it in the variable url.
Step 3: Create the QR Code
Generate a QR code from the provided URL:
createQR(text: url, correction: Medium) >> qrCode
This creates a QR code from the URL with a Medium error correction level and stores it in qrCode.
Step 4: Display the QR Code
Display the generated QR code to the user:
quicklook(input: qrCode)
This allows the user to preview the generated QR code.
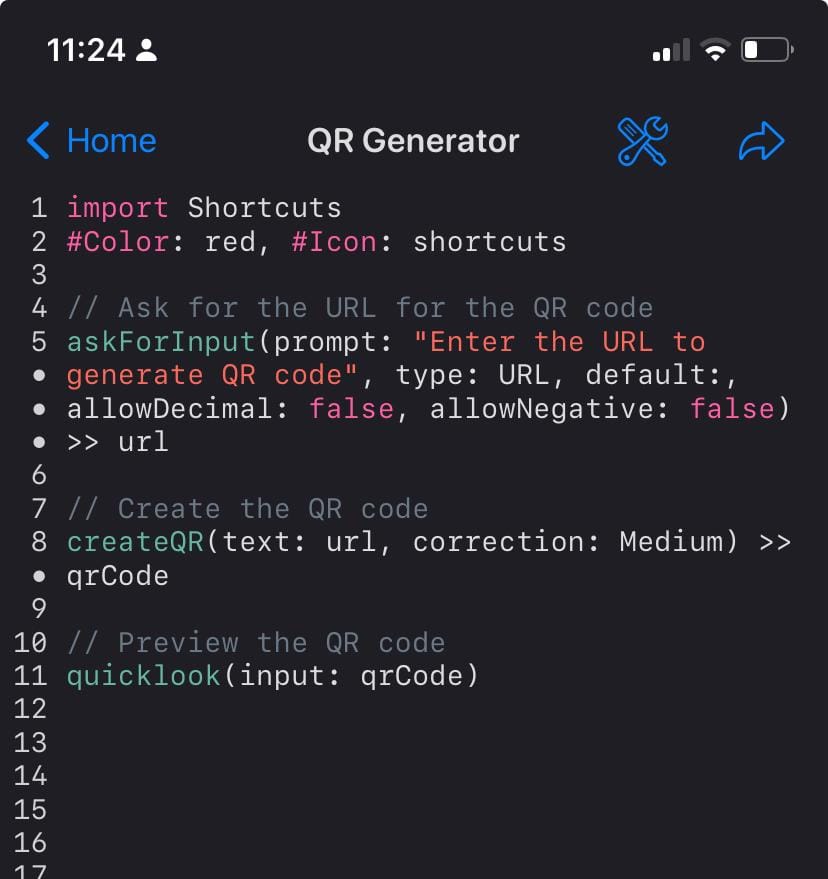
Complete Shortcut Code
Here is the complete example code to create this shortcut in Jellycuts:
import Shortcuts
// Color: red, Icon: shortcuts

// Ask for the URL for the QR code
askForInput(prompt: "Enter the URL to generate QR code", type: URL, default:, allowDecimal: false, allowNegative: false) >> url

// Create the QR code
createQR(text: url, correction: Medium) >> qrCode

// Preview the QR code
quicklook(input: qrCode)
Now compile in Jellycuts
Export your jelly to your shortcut gallery and you're done.
Conclusion
With this guide, you can easily create a Jellycuts shortcut that asks the user for a URL, generates a QR code from that URL, and then displays the result using quicklook. This is an effective way to automate QR code generation on your iOS device. If you have any more questions or need further examples, feel free to ask!