Gemini API Integration with Apple Shortcuts: A Step-by-Step Tutorial
In this tutorial, we will learn how to use the Gemini API, recently released by Google. We are all eager to know what we can do with this API and Apple Shortcuts.
Getting your API Key
To get started, go to the Gemini website, which is hosted at https://ai.google.dev/. On this URL, you will find the option to obtain your API key by clicking on "Get API key in Google Studio."

,
You can integrate it with Python, Kotlin for Android, Node.js, Swift, Web, and more. The details on integration are well-explained on the official page. Currently, only Gemini Pro is available, which is equivalent to GPT 3.5 in terms of performance and similar response. As it was recently launched, it is offered for free to everyone with a limit of sixty requests per minute, which is quite good for a free service.
In the documentation, you can find information for different languages such as Python, Node, Web, etc. In our case, we will use the REST API because it allows us to use shortcuts. Once you learn to use it with the REST API, you can switch to your preferred programming language.
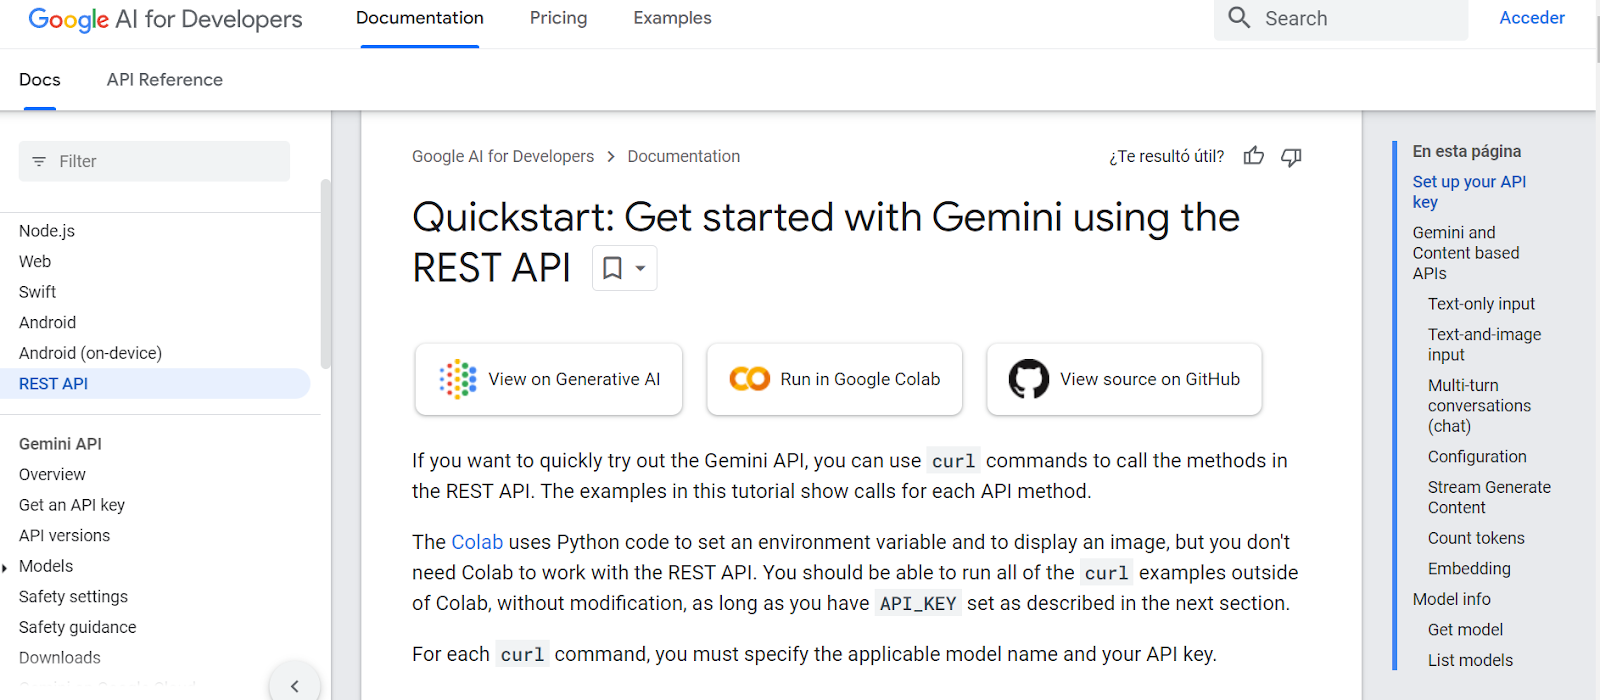
Let's request the API Key. You need to be registered on Google for this. If you're not, follow the process, request the key, and you're ready to go. Alternatively, for a more direct approach, go to this link to get you API Key: https://makersuite.google.com/app/apikey.
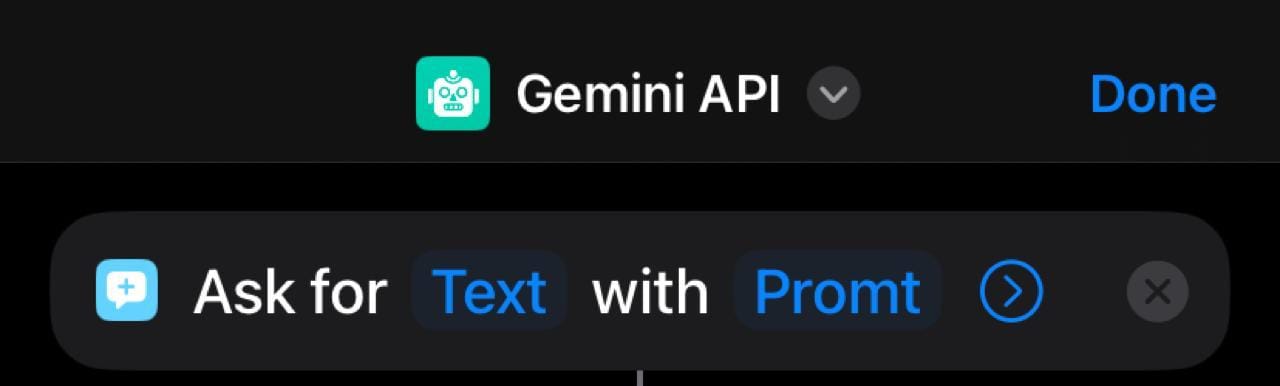
Creating our shortcut
Now, go to your Apple Shortcuts app and create a shortcut named "Gemini API" to start using the Gemini API with Apple Shortcuts.
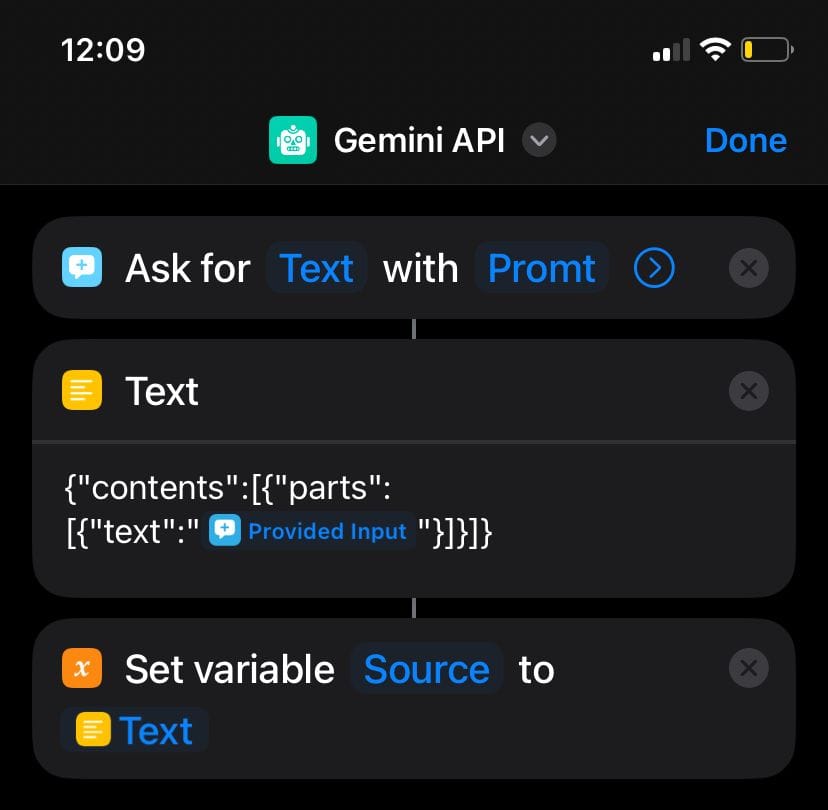
To begin, add the "Ask for input" action. Choose text as the input data and set the prompt as you prefer. We won't focus much on these details since the goal is to use the Gemini API.
According to the Google documentation, use this method to your Apple Shortcut.
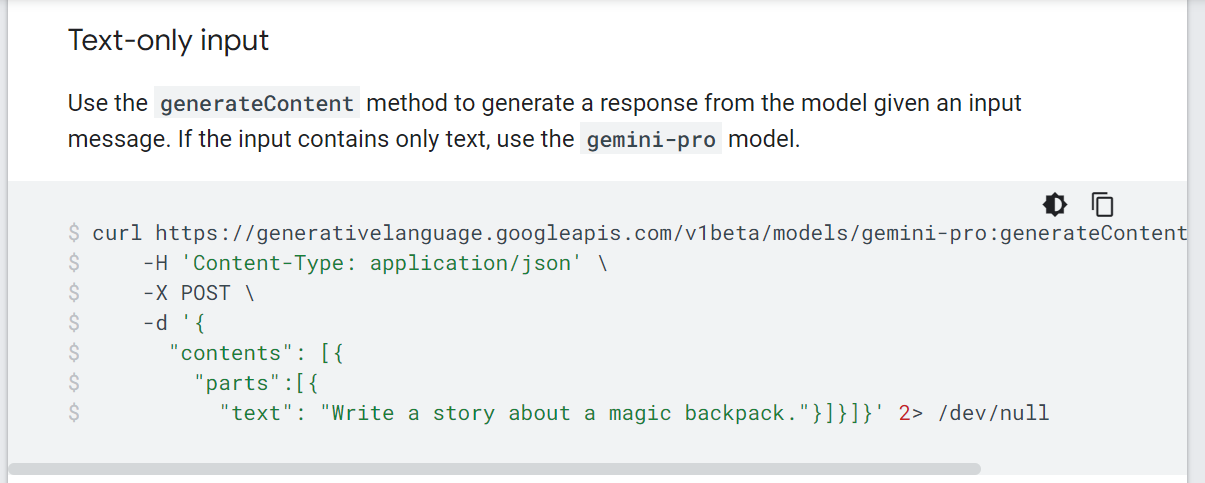
Next, add a Text field and arrange the code as follows:
{"contents": [{"parts":[{"text": "Provided Input"}]}]}
Provided input represents the input data of the Ask fo Input action at the beginning of our shortcut.
Now, set a variable to store your code, your shortcut should look like this so far:
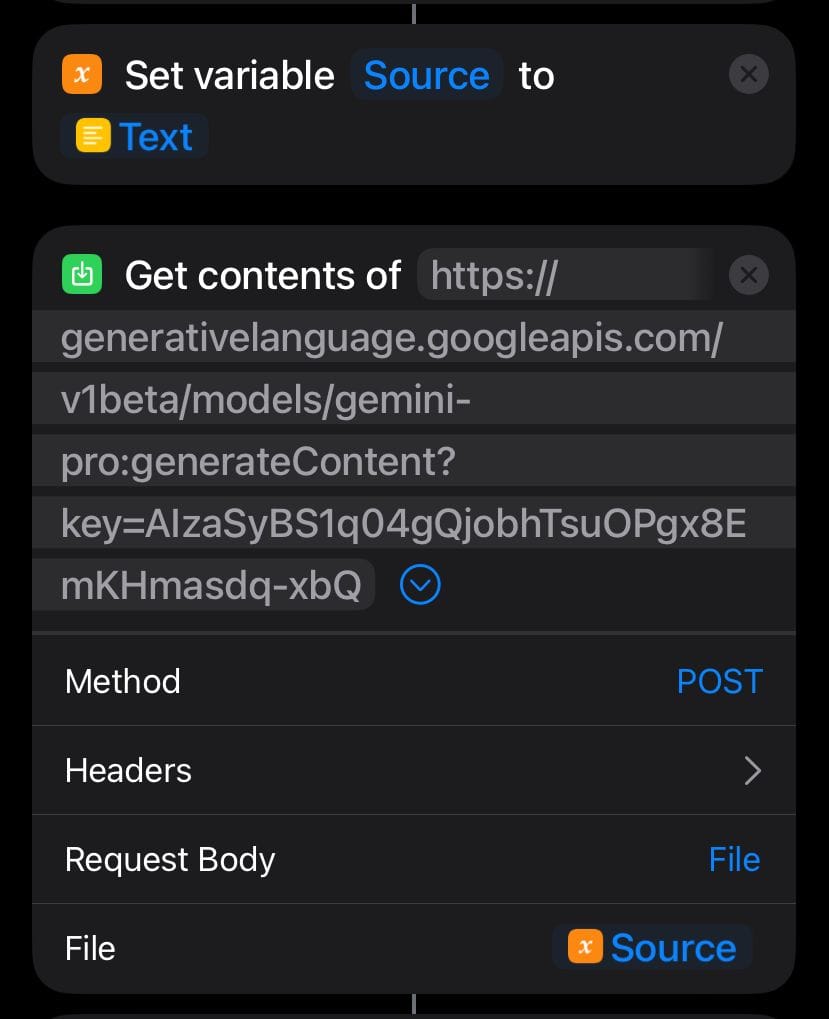
Add "Get Contents of URL" action and add the Gemini API URL: https://generativelanguage.googleapis.com/v1beta/models/gemini-pro:generateContent?key=$API_KEY
Replace $API_KEY with yout Gemini API key generated earlier, set Method as POST, Request Body a "File" and select the variable as "File".
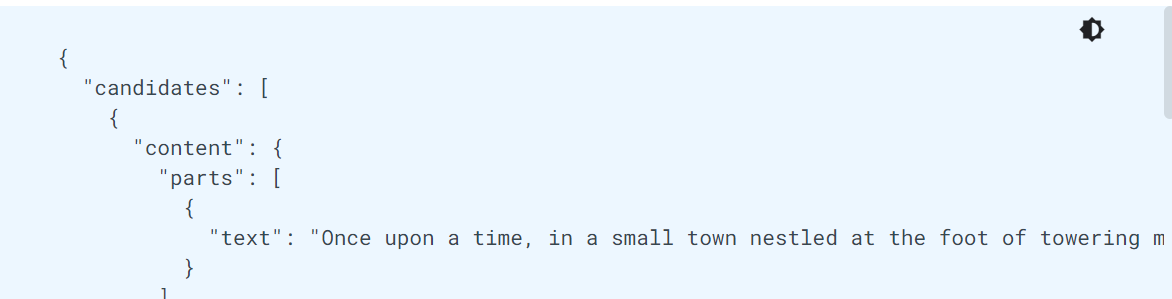
Refer back to the Gemini API documentation to see the response format. For now, we'll focus on this part to test the successful connection:
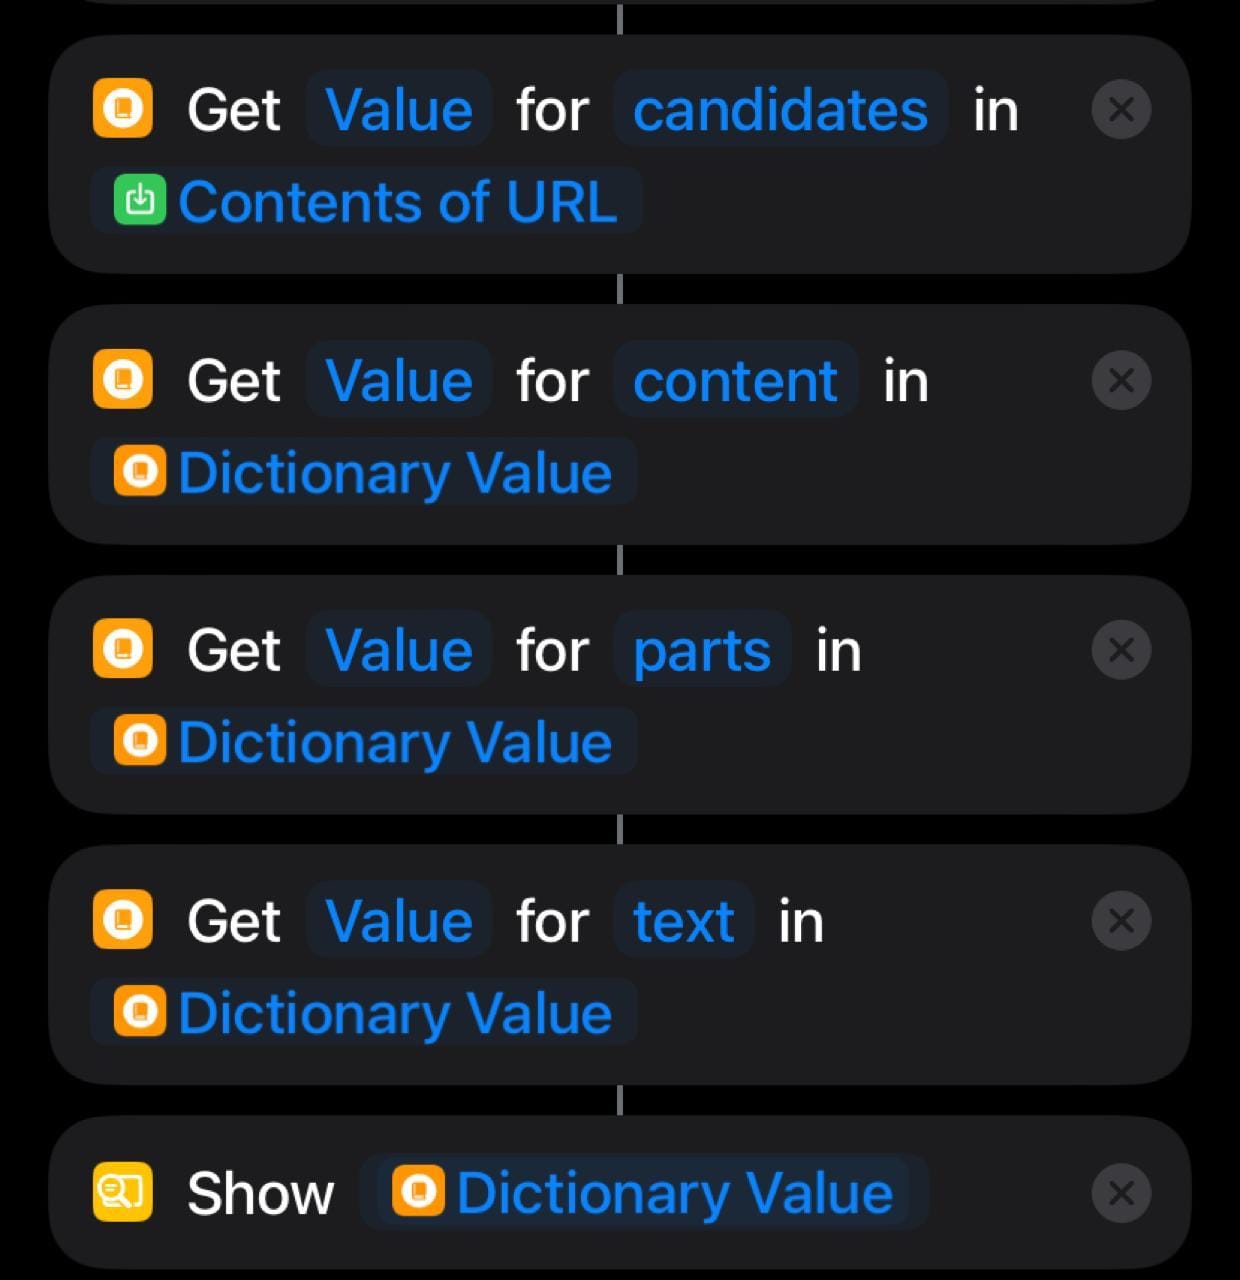
To filter the code and display only the response, add the "Get Dictionary Value" action:
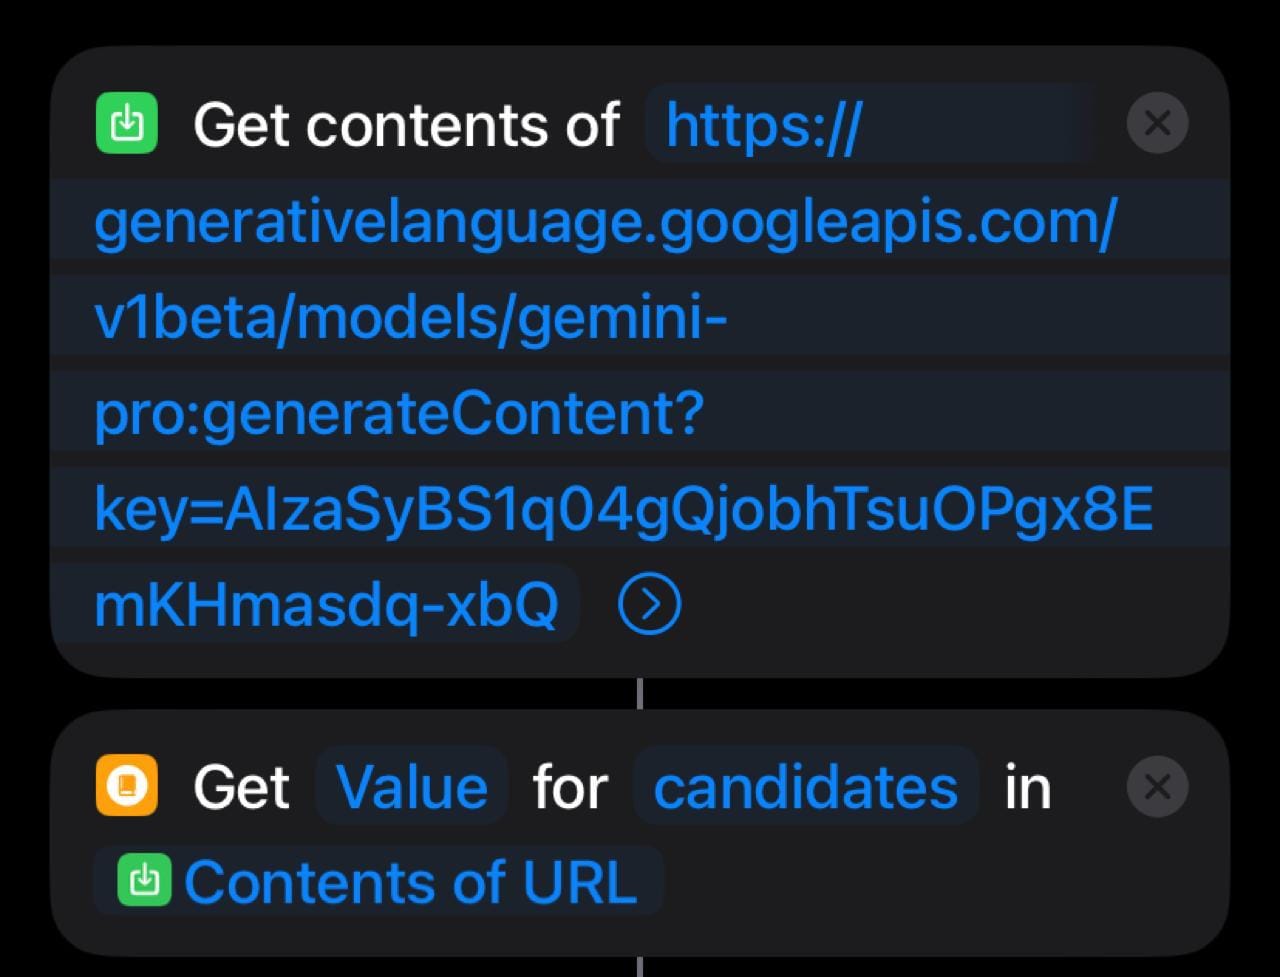
Add actions for candidates, content, parts, and text successively. Finally, include the "Show Result" action to display the Gemini response.
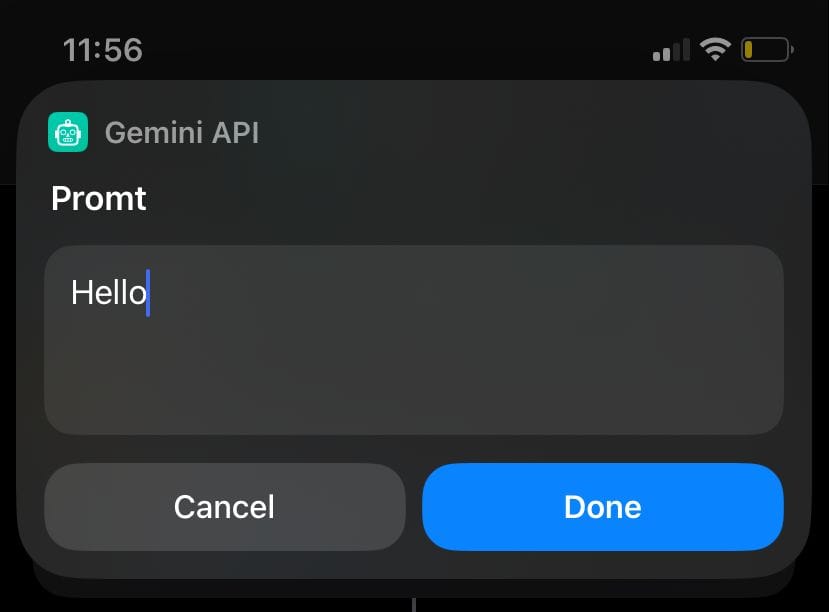
Testing our API responses
Now we are going to test it, sending a Hello as a Prompt, and it will give us a very basic response, but with that alone we will know that everything is working.
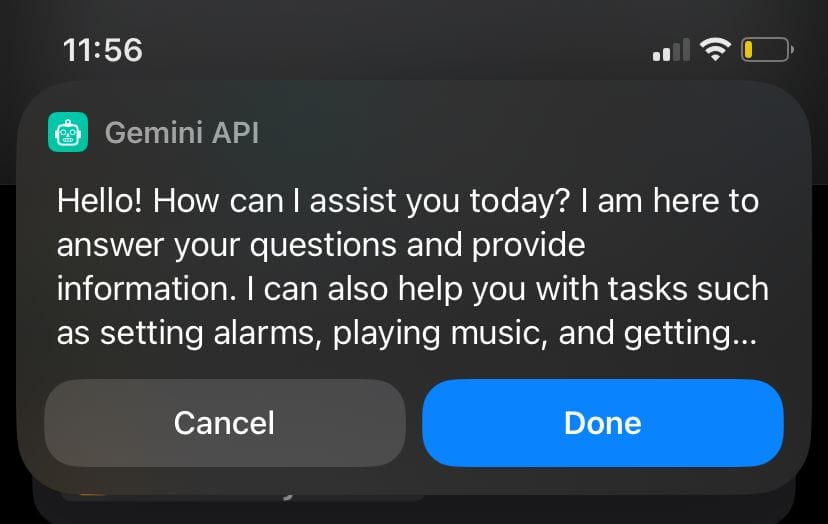
That's it! You've successfully made a request to the Gemini API and received a response, which we've formatted for easier visualization.
The purpose of this tutorial is to demonstrate how to start working with the Gemini API in a simple and easy-to-learn way. Remember that you can send many types of data, including images, and responses can be more complex. I recommend exploring more of Google AI documentation and creating increasingly complex shortcuts to impress the community.