How to Create a Shortcut to Convert a PDF to Image Using Jellycuts
Learn step-by-step how to create your own Apple shortcut to convert PDF files to images using Jellycuts.

In this tutorial, you'll learn how to make an apple shortcut to convert a PDF file into an image using Jellycuts, a powerful tool for creating shortcuts from code on your iOS device. This shortcut will allow you to select a PDF file, convert it into an image, and then preview the generated image. Let’s get started!
We'll start by creating a Jelly file. If you don't know how to do it, here's a guide to getting started with Jellycuts—it's easy to learn.
Step 1: Import the Shortcuts Library
The first thing you need to do is import the Shortcuts library, which contains all the functions necessary to work with shortcuts on iOS.
import Shortcuts
Step 2: Customize the Icon and Color
Next, you can customize the color and icon of your shortcut. This step isn’t mandatory, but it can help you quickly identify your shortcut in the Shortcuts list.
#Color: red, Icon: shortcut
Step 3: Select a PDF File
Now, let's prompt the user to select a PDF file from the system. We’ll use the selectFile action for this purpose. In this example, we allow the selection of only one file.
selectFile(type: Files, multiple: false) >> selectedPDF
Step 4: Convert the PDF to an Image
Once you've selected the PDF file, it's time to convert it into an image. We’ll use the imageFromPDF action to do this. This command converts the PDF to an image using the PDF format, RGB color space, and a resolution of 300 dpi.
imageFromPDF(pdf: selectedPDF, format: PDF, colorspace: RGB, resolution: 300) >> pdfImage
Step 5: Preview the Generated Image
Finally, we'll use the quicklook action to display a preview of the generated image. This allows you to view the resulting image directly on your device.
quicklook(input: pdfImage)
Complete Code
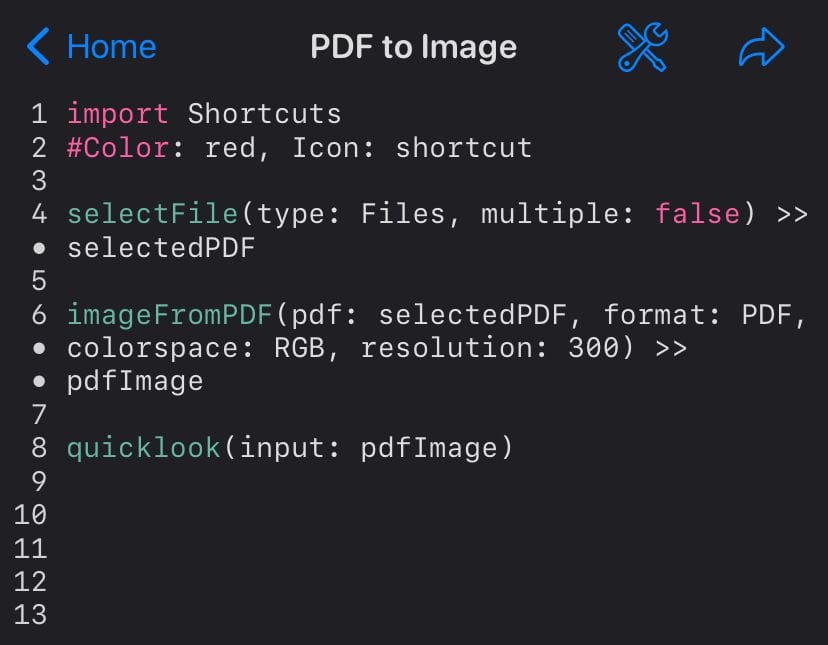
Here’s the complete code that you can copy and paste into Jellycuts:
import Shortcuts
#Color: red, Icon: shortcut

selectFile(type: Files, multiple: false) >> selectedPDF

imageFromPDF(pdf: selectedPDF, format: PDF, colorspace: RGB, resolution: 300) >> pdfImage

quicklook(input: pdfImage)
Step 6: Export to Shortcut Library
Once we have finished our code in Jelly, we'll export it to our Apple Shortcuts library.

Step 7: Test Your Shortcut
Now that you've created the shortcut, it’s time to test it to ensure it works correctly. Follow these steps:
- Run the Shortcut: From the Shortcuts app on your iOS device, select the shortcut you just created and run it.
- Select a PDF File: When prompted, select a PDF file from your system.
- Verify the Conversion: The shortcut should convert the selected PDF into an PNG image. After the conversion, a preview of the generated image will be displayed. Check the image to ensure it has been converted correctly.
- Customize: If the image isn’t generated as expected, you can return to Jellycuts and adjust the parameters, such as the resolution or color space, to achieve the desired result.
Despite being a fairly simple shortcut, its really useful. I'm sure it can still be improved and have new features added. Thanks for reading.