How to Send a POST Request With Apple Shortcuts

This is a simple, practical guide for Shortcut developers who want to go beyond GET requests and learn how to send data to web services. Unlike GET requests, which only retrieve information, POST requests allow you to create or update resources on a server.
In this exercise, we’ll build a shortcut that sends a POST request to an API and creates a new post. This article will help you understand how to configure and send data to a server directly from your shortcuts.
Step 1: Create the Shortcut
Open the Shortcuts app and create a new shortcut.
Name it “Post Request Shortcut”.
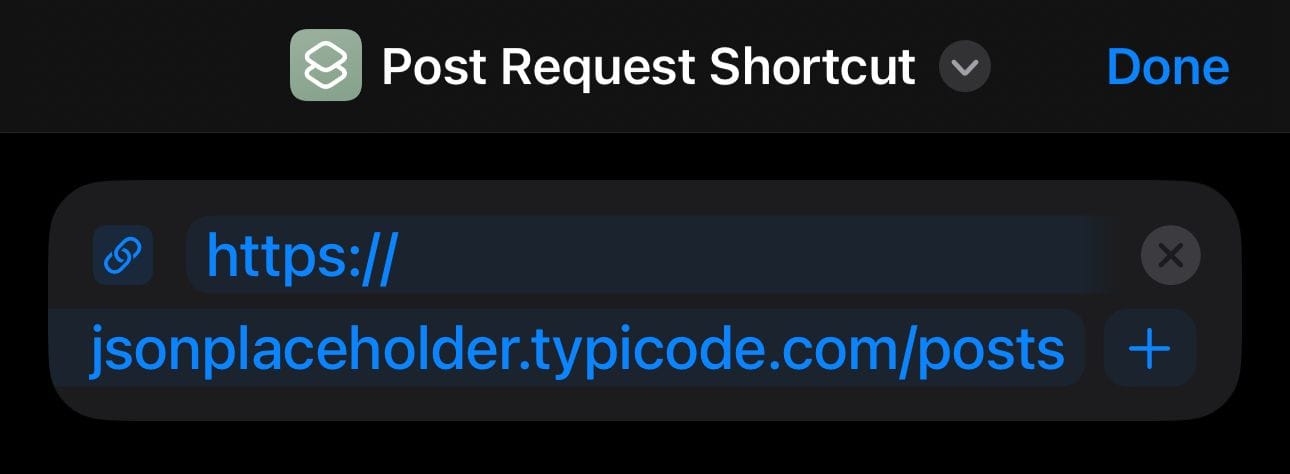
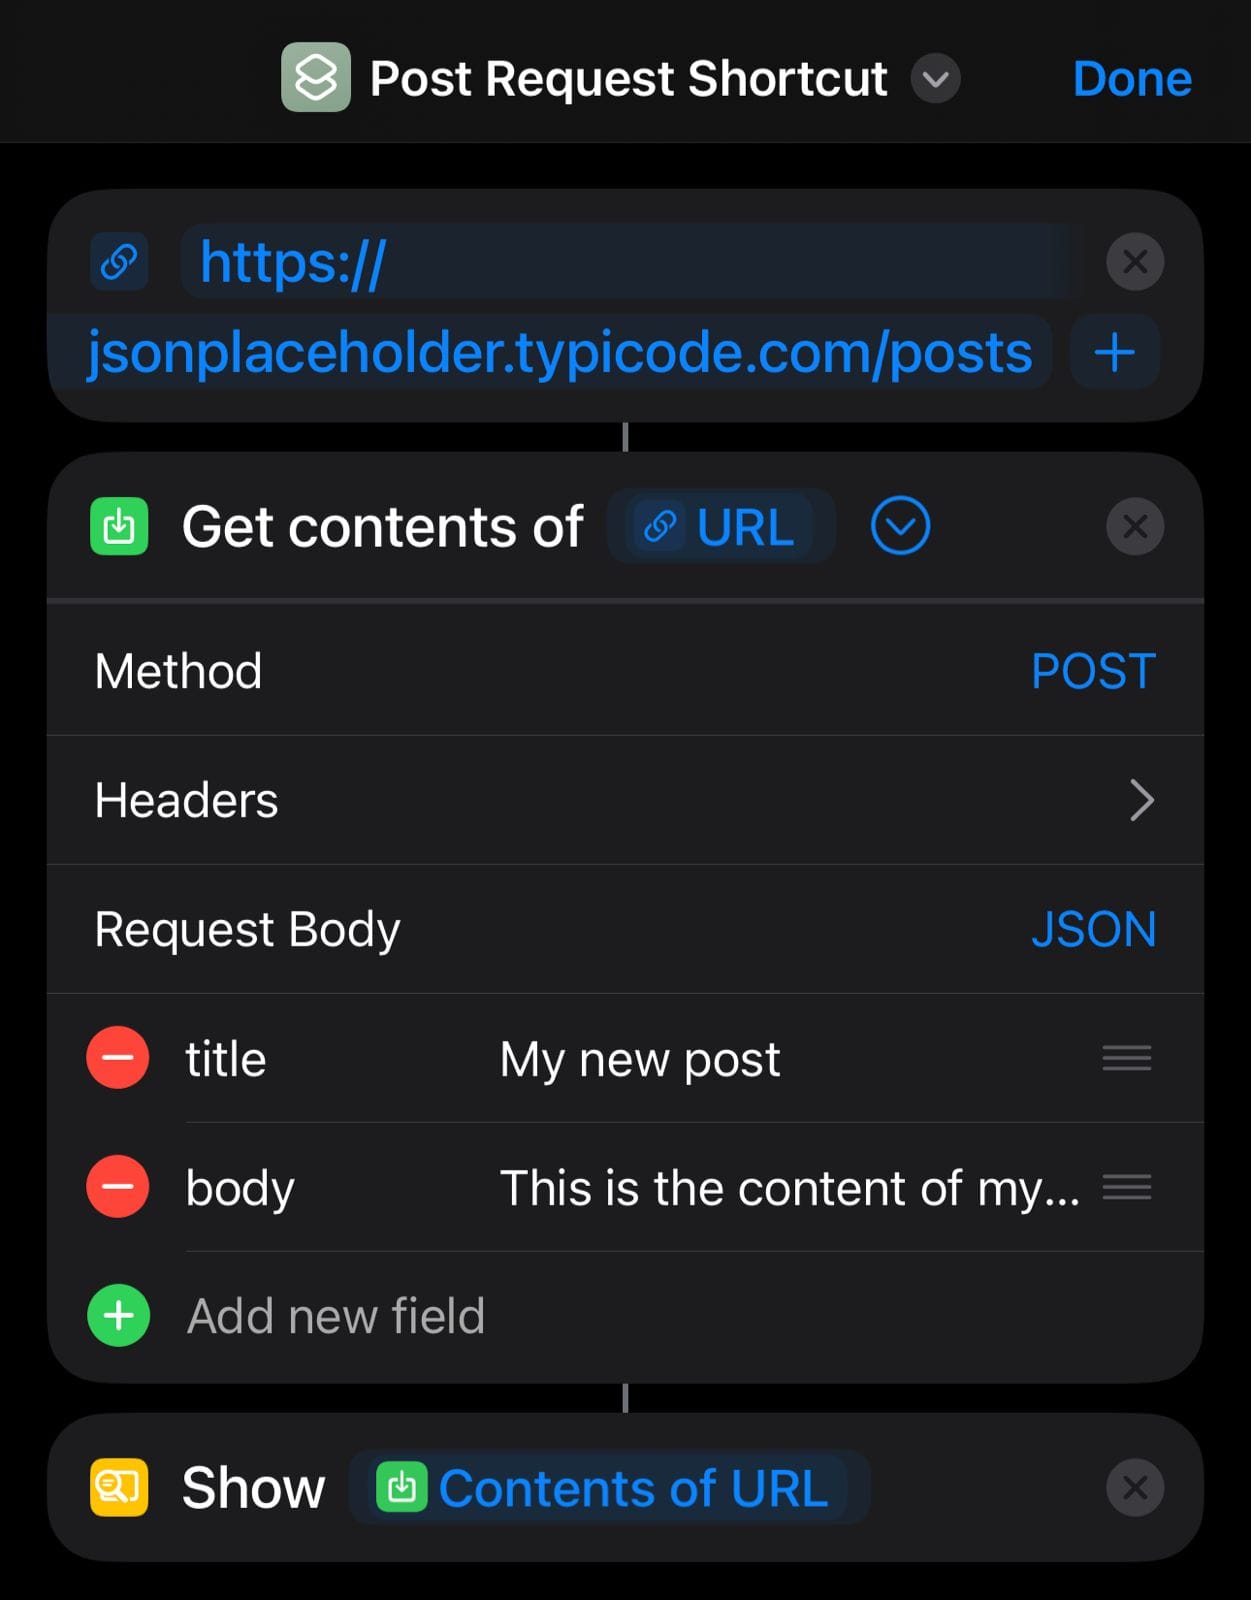
Step 2: Define the API Endpoint
Add the “URL” action to the shortcut.
In the URL field, enter the following API endpoint address:
https://jsonplaceholder.typicode.com/posts
Context: An endpoint is the specific web address of the API you’re working with. In this case, we’re using JSONPlaceholder, a free testing API commonly used to practice sending requests.
Step 3: Configure the POST Request
Add the “Get Contents of URL” action.
- Tap on Show More.
- Change the method from GET to POST.
Context: This step switches the request type. Instead of asking the server for data (GET), we’re telling it to accept data from us (POST).
Step 4: Add the Request Body in JSON Format
A POST request usually needs to send extra data—this is called the request body. In this case, we’ll send the data in JSON format, which is the most common way APIs accept information.
- In the Get Contents of URL action, find the Request Body option.
- Select JSON as the format.
- Add two text fields:
- Under Key, type
title. Under Value, type:My new post. - Under Key, type
body. Under Value, type:This is the content of my new post.
- Under Key, type
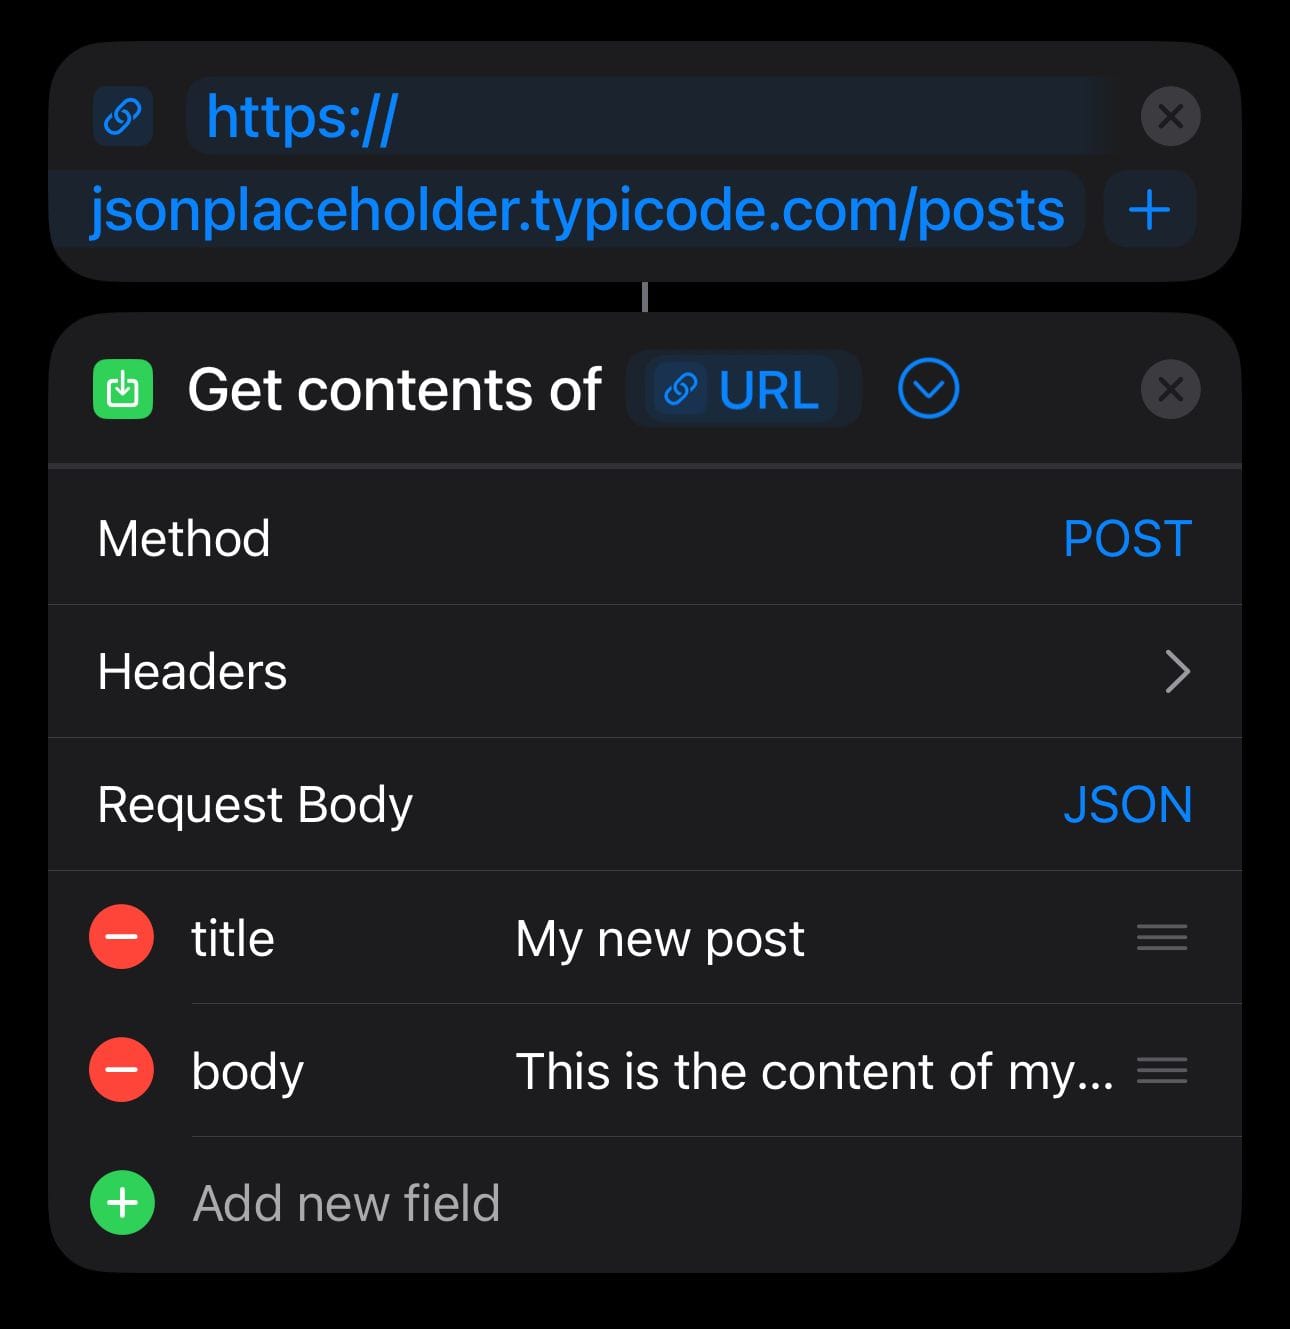
Context: JSON is a standard format that structures data in key-value pairs. In this example, we’re sending an object with two keys (title and body). The server will use them to create a new post.
Step 5: Show the Result
Add the “Show Result” action.
This action will display the server’s response when the request is successful.
Context: The response will come back in JSON format. It will include the title and body you sent, plus an automatically generated id. For example:
{
  "title": "My new post",
  "body": "This is the content of my new post",
  "id": 101
}
Shortcut Summary
Your final shortcut should look like this, from top to bottom:
- URL:
https://jsonplaceholder.typicode.com/posts - Get Contents of URL (Method: POST)
- Request Body (JSON) →
- Key:
title→ Value: “My new post” - Key:
body→ Value: “This is the content of my new post”
- Key:
- Request Body (JSON) →
- Show Result
Final Thoughts
With this exercise, you’ve successfully completed a POST request, one of the most common operations when working with APIs. This technique allows you not only to read data from a server but also to create new information.
From here, you can explore APIs that require more complex forms, authentication details, or custom data. Each API is different, so it’s always important to check its documentation.
Keep trying, and you’ll see your shortcuts become more powerful with every request you send.