Tutorial to Create an Image Converter Shortcut with Jellycuts

Welcome to our tutorial on using Jellycuts, a dynamic tool for iOS that lets you create powerful shortcuts with a coding twist. Here, we’re focusing on a particularly useful task: converting images to different formats. This shortcut is perfect for quickly changing image formats for various needs, from adjusting photos for social media or whatever you need.
We'll walk you through each step of creating this shortcut, showing you how to select, convert, and save images, as well as how to access file details. Ready to enhance your iOS experience with this practical Jellycuts shortcut? Let’s get started!
Step 1: Setting Up the Shortcut Environment
First, let's write the initial lines of our code that set up the environment for our shortcut.
Write:
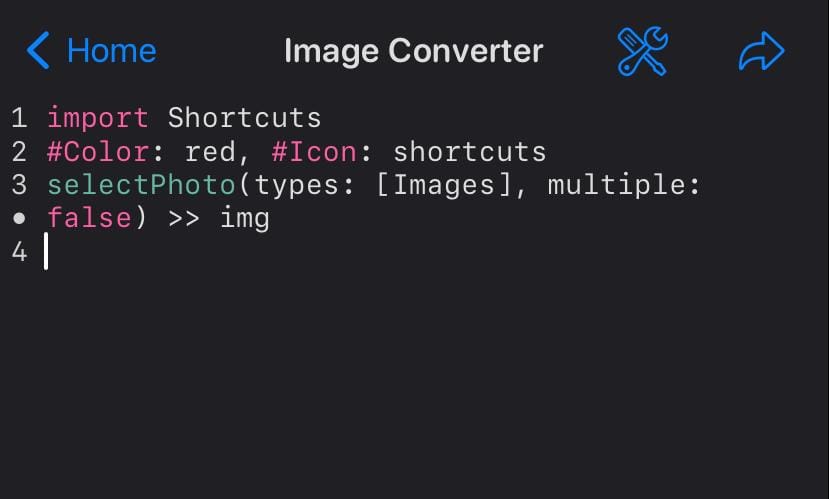
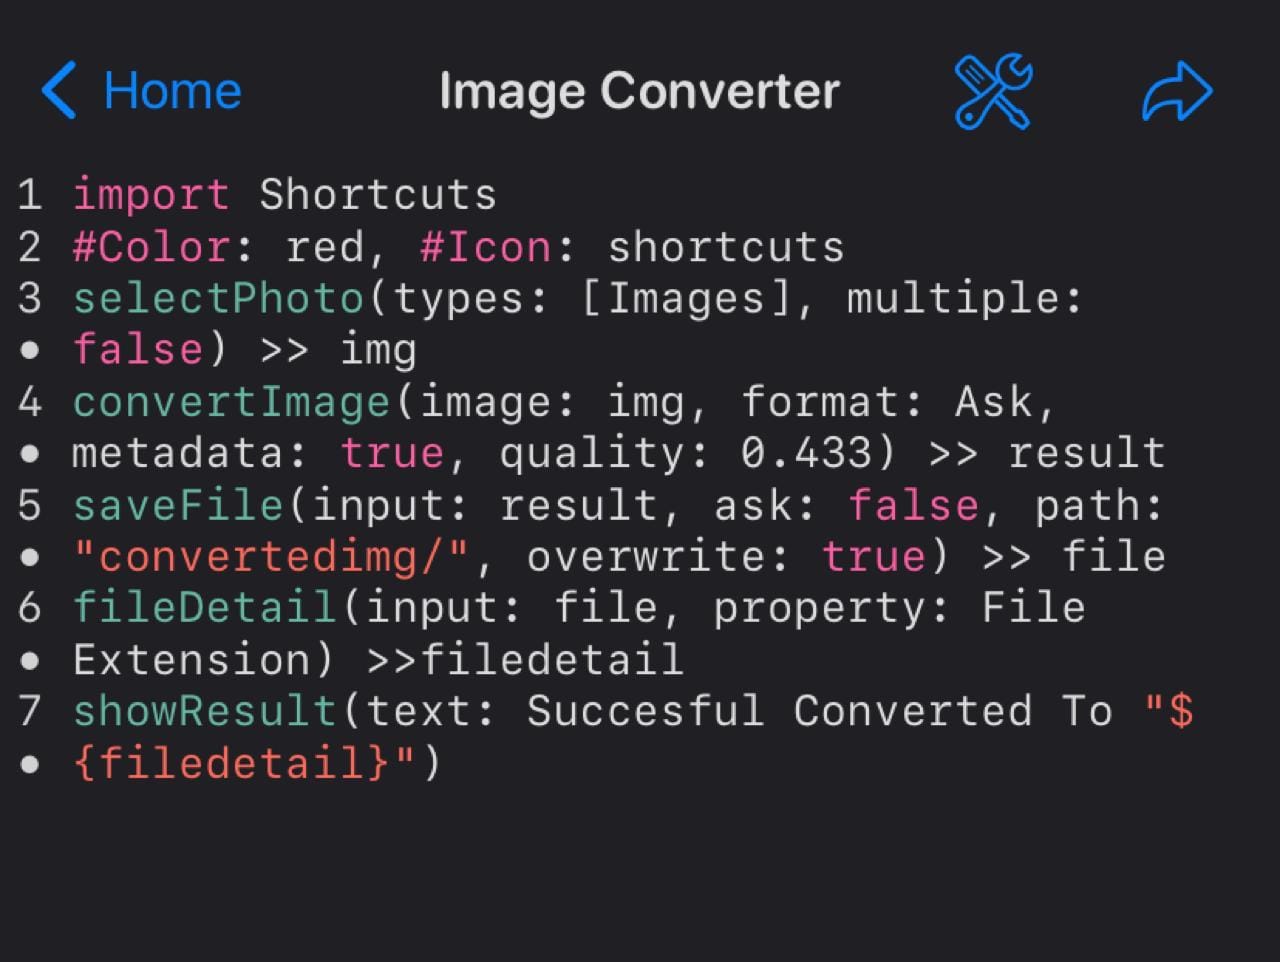
import Shortcuts
#Color: red, #Icon: shortcuts
Here, import Shortcuts allows our shortcut to access actions from the iOS Shortcuts app. With #Color: red and #Icon: shortcuts, we personalize the color and icon of our shortcut, giving it a distinctive look.
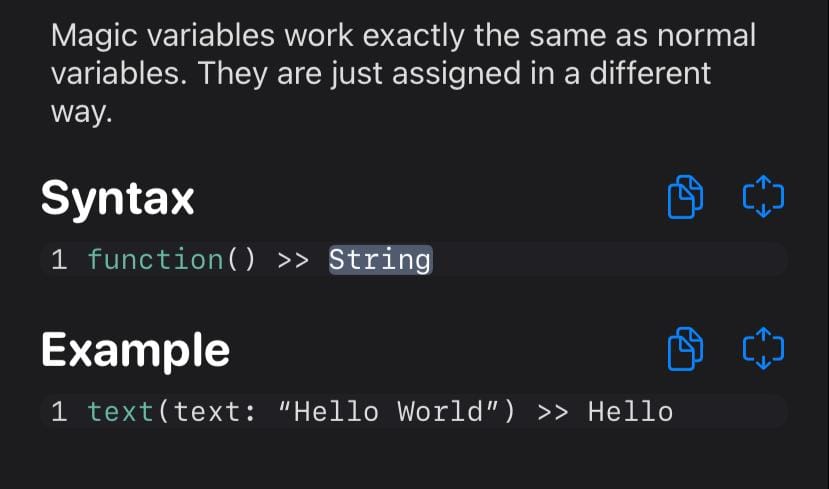
For this shortcut, we will use magic variables, which at least for me is one of the most effective ways to make a shortcut in Jelly
Step 2: Selecting a Photo
Next, add the capability to select a photo from your gallery.
Write:
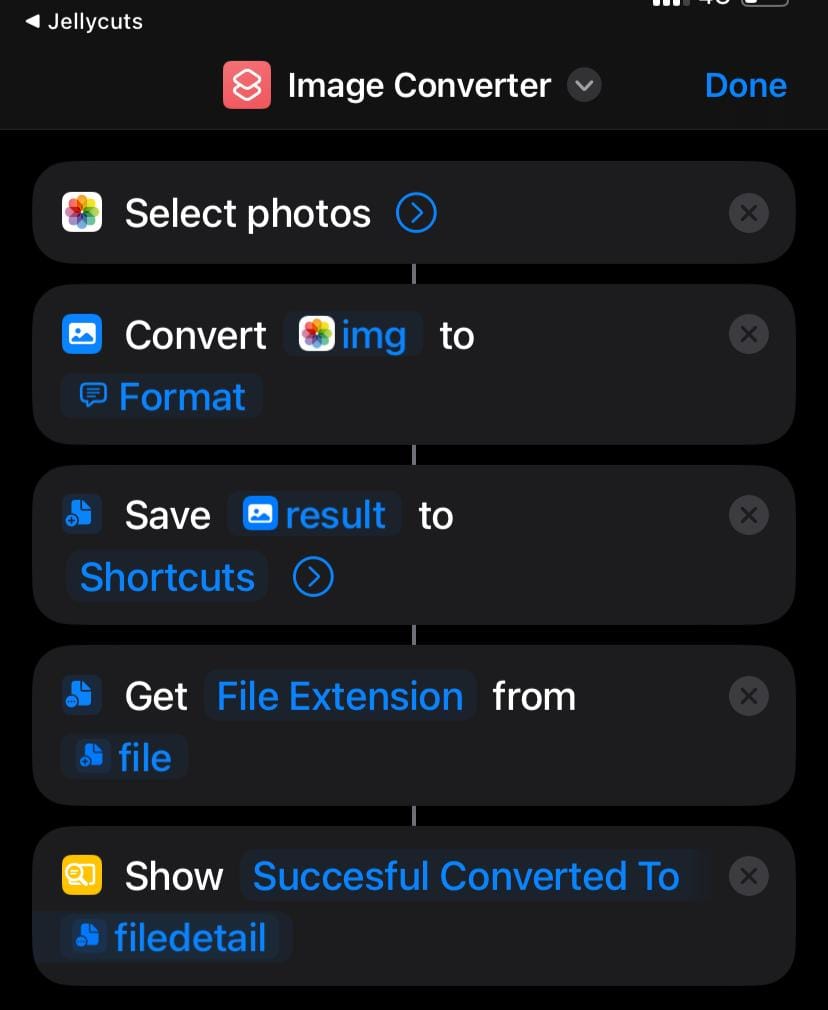
selectPhoto(types: [Images], multiple: false) >> imgThis line opens your gallery and lets you choose a photo. The multiple: false ensures that you can only select one image at a time. The chosen image is stored in the variable img.
Step 3: Converting the Image
Now, let's add the function to convert this image to a specific format.
Write:
convertImage(image: img, format: Ask, metadata: true, quality: 0.433) >> result
Here, convertImage takes the selected image (img) and converts it to the format chosen by the user (format: Ask). We keep the original metadata (metadata: true) and set a specific quality (quality: 0.433). The converted image is stored in result.
Step 4: Saving the Converted Image
The next step is to save this converted image on your device.
Write:
saveFile(input: result, ask: false, path: "convertedimg/", overwrite: true) >> file
saveFile saves the image (input: result). ask: false means the user won't be asked where to save it; it will directly be saved in a folder named convertedimg/. If the file already exists, it will overwrite it (overwrite: true). file stores a reference to the file.
Step 5: Obtaining Details of the Saved File
To wrap up, let's obtain details of the file we just saved.
Write:
fileDetail(input: file, property: File Extension) >> filedetailfileDetail is used to get the extension of the saved file. This information is stored in filedetail.
Step 6: Displaying the Result to the User
Finally, let's inform the user that the image has been successfully converted.
Write:
showResult(text: "Successful Converted To ${filedetail}")showResult displays a message indicating the success of the conversion and the extension of the resulting file.
Final Step: Exporting and Testing the Shortcut
Once you’ve followed the steps to create your image conversion shortcut in Jellycuts, it’s time to bring it to life in the Shortcuts app.
- Export Your Shortcut:
- In Jellycuts, locate the completed shortcut.
- Use the export option to transfer your shortcut to the iOS Shortcuts app.
- If everything is OK, you will not get any errors in the console and it will be added to the shortcut library.
- Test Your Shortcut:
- Find the newly added shortcut.
- Run it to ensure it works as expected – select an image, let it convert, and check the saved file and the resulting notification for accuracy.
Congratulations! You've successfully created and tested a custom image conversion shortcut using Jellycuts. This tutorial not only introduced you to the versatile world of Jellycuts but also empowered you with a practical tool to handle image formats efficiently.
The skills you've learned here are just the beginning – Jellycuts offers endless possibilities for automating and simplifying tasks on your iOS device. So, keep experimenting, exploring, and enhancing your developer experience!